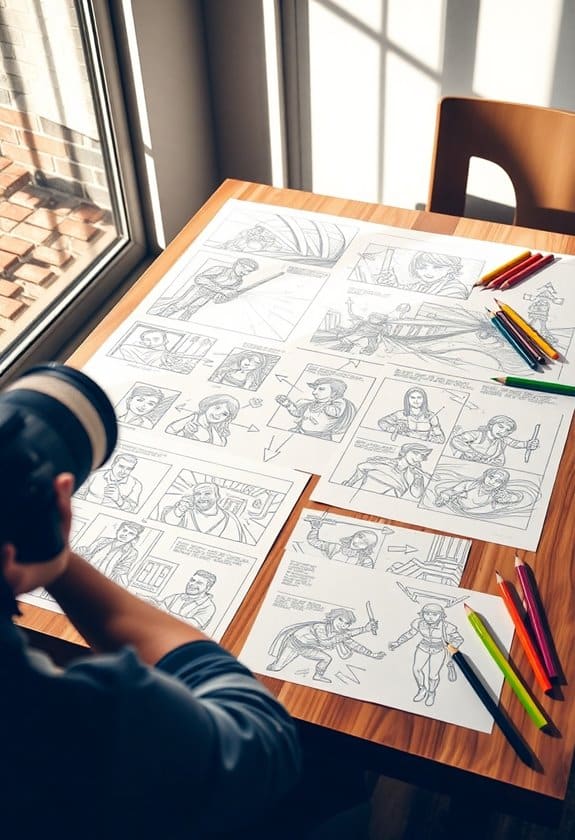
Imagine turning your wildest ideas into a miniature comic strip that brings your story to life—welcome to storyboarding! Start with simple sketches; think of them as rough drafts where stick figures do the heavy lifting. Gather your story elements like a treasure hunt: characters, settings, and dramatic scenes. As you sketch, play with angles to create depth, and make sure each frame tells its own mini-story without leaving viewers scratching their heads. The real magic happens when you polish these sketches, refining them into a coherent visual narrative. Trust me, it’s like solving a really creative jigsaw puzzle! Discover techniques to refine your storyboard even further.
Important Highlights
- Identify main characters, motivations, and conflicts to establish the story’s foundation.
- Sketch initial frames with simple shapes to represent characters and props clearly.
- Use arrows to indicate movement and experiment with camera angles for depth.
- Ensure each frame conveys a clear part of the story to avoid audience confusion.
- Reassess scene flow, adding details like camera angles for logical progression.
Understanding Storyboarding Basics

When you’re diving into storyboarding, understanding the basics is essential to creating a coherent and engaging visual narrative. Imagine storyboarding as crafting a comic strip for your film. It’s your chance to sketch out scenes, ensuring each frame tells a part of your story and keeps your audience safe from confusion.
Start with simple sketches; they don’t need to be perfect. My first storyboard looked like a doodle from math class, but it made sense to me! Use arrows to show movement, and think about camera angles—like a director guiding you through a scene.
Gathering Your Story Elements

Now that you’ve got a handle on the storyboarding basics, it’s time to focus on gathering your story elements. Think of this as collecting puzzle pieces before creating a masterpiece.
Start by jotting down your main characters, their motivations, and any conflicts they might face. It’s like preparing for a safe adventure; knowing your characters well prevents surprises.
Next, outline key events that propel your story forward. I once forgot an essential plot twist—don’t repeat my mistake!
Also, consider the setting, as it creates the backdrop for your narrative. It’s like choosing the right playground where your characters will safely interact.
Sketching Initial Frames

Jump into sketching your initial frames by focusing on translating your story elements into visual representations. Imagine this: you’re an artist bringing your story to life, one frame at a time.
Begin by drawing rough sketches of key scenes—don’t stress about perfection; even stick figures can work! I remember my first storyboard looked like a comic strip gone wrong, but it captured the essence of my tale.
Use simple shapes to convey characters and props, and play with angles to add depth. Keep your scenes safe by ensuring clarity—each frame should tell a part of your story without confusion.
Think of it as creating a puzzle, where each piece fits securely, guiding viewers safely through your narrative journey.
Developing a Visual Narrative

Crafting a compelling visual narrative is like weaving a tapestry where each thread contributes to the overall picture. When developing your story’s visual side, think of each frame as a mini-story.
Remember, your audience craves clarity and comfort, so guarantee your visuals guide them smoothly. Like when I first tried storyboarding, I learned that combining images with emotions creates magic.
Start by sketching key scenes that show your main character’s journey. Use colors and shapes to express moods—dark hues for tension, bright ones for joy.
Don’t fret if your first drafts seem rough; it’s all part of the creative process. Stay patient, and soon you’ll see your story come to life, like watching a favorite movie unfold.
Refining Your Storyboard

Once you’ve sketched the initial visuals, it’s time to refine your storyboard into a cohesive sequence. This is where your creative vision starts to take shape, and trust me, it’s worth the effort.
Here’s how you can do it:
- Reassess the Flow: Make sure each scene logically follows the next. Imagine watching your story unfold; does it make you feel safe and connected?
- Add Details: Include key elements like camera angles and character positions. It’s like adding sprinkles to your ice cream—makes everything more delightful!
- Simplify: Remove any clutter that doesn’t serve the story. Less is more, and you’ll appreciate the clarity.
Refining is like polishing a gem; it’s hard work, but the sparkle is worth it. Additionally, consider using an acrylic clapboard to keep your scenes organized and enhance your production’s professionalism.
Sharing and Receiving Feedback

With your storyboard polished to perfection, it’s time to put it to the test by sharing it with others. This step can feel a bit nerve-wracking, but remember, feedback is like a treasure map guiding you to a better story.
Start by showing it to trusted friends or family who understand your vision. I once shared a storyboard with a classmate who spotted a plot hole I’d completely missed. It was a lifesaver!
Encourage constructive feedback by asking specific questions. For instance, “Does the pacing feel right?” or “Do these scenes convey the emotion I’m aiming for?”
It’s important to listen openly and consider their suggestions, but remember, it’s your story. Use feedback to polish your work, ensuring it’s safe and strong for the next steps.
Frequently Asked Questions
What Tools Can I Use to Create Digital Storyboards?
Creating digital storyboards can be super fun and safe with the right tools. You might try Storyboard That or Canva, both user-friendly and perfect for beginners.
I remember when I first used them; it felt like magic seeing my ideas come to life!
Toon Boom also offers great features if you’re up for a challenge.
Just remember, don’t rush. Take your time, explore different tools, and let your creativity shine!
How Long Should a Typical Storyboard Be?
Did you know Pixar sometimes uses over 100,000 storyboards for a film? Now, don’t panic; yours won’t need to be that long!
A typical storyboard varies based on your project. For a short film, aim for 10-20 panels. It’s like drawing a comic strip of your story.
Are Storyboards Necessary for Every Type of Project?
You might wonder if storyboards are necessary for every project. Well, think of them like a safety net. They help map out what you’re envisioning, so everyone’s on the same page, especially in filmmaking.
Imagine trying to build a treehouse without a plan! Of course, not every project needs one, but for complex stories or big ideas, they’re super helpful.
I once skipped it and ended up with a chaotic mess—lesson learned!
Can I Use Photographs Instead of Drawings in a Storyboard?
Sure, you can definitely use photographs in a storyboard!
Think of it like using a snapshot instead of a sketch; both can tell a story, but photos might capture a moment more vividly.
When I started filmmaking, I’d a few rough sketches that looked more like potato people!
Using photos can make your storyboard clearer, helping everyone feel secure and on the same page.
Plus, it’s a fun way to personalize your project!
How Do I Handle Changes in the Story After the Storyboard Is Complete?
Handling changes in your story after completing your storyboard can feel like a whirlwind, but it’s totally doable! First, don’t panic. Roll with the punches and update your storyboard where necessary.
You might use sticky notes to jot down new ideas or changes, making adjustments as needed. Think of it like updating a game plan.
As a filmmaker, staying flexible is key. Embrace changes—they often lead to even better storytelling!


